Introduction #
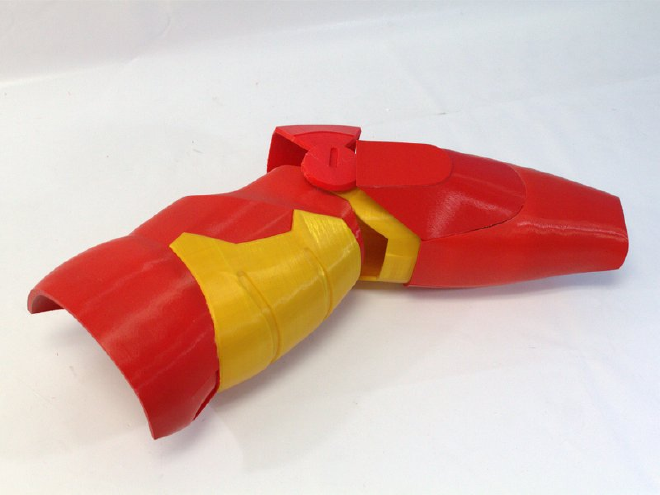
I’ve been working on 3D printing a Mark III Iron Man suit based on DancinFool’s Pepakura files. It turns out that 3D printing pep files is a lot harder than just converting them to STL and hitting print. I didn’t find any really thorough guides already, so I collected all the information on the problems I’ve run into and the techniques I learned to solve them, and put them in this tutorial.
I’m going to cover cleaning up the models, giving them thickness. getting the scaling right, adding some detail, and then cutting everything up into pieces small enough for printing. We’re going to do all of this using Blender, a very powerful free tool for 3D modeling. Blender is scary, but I hope this guide will be a good introduction for people who have never used it before.
This guide is written with pep files in mind, but I think a lot of it is applicable to printing game models or any other sort of meshes. A coworker of mine did a nice guide on using the same techniques for printing game models. You can find it here. http://www.matterhackers.com/articles/how-to-use-blender-to-improve-your-designs
Step 1 - Export OBJ from Pepakura Designer #
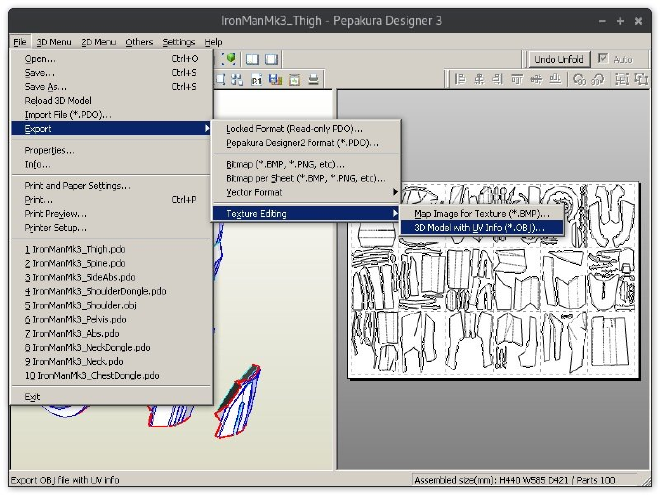
First we will need to export the model from Pepakura Designer. To do this, go to File > Export > Texture Editing > 3D Model with UV Info.
Step 2 - Import into Blender #
We are now going to take the model into Blender and make some modifications to get it ready for 3D printing.
Many of you may already be familiar with basic editing in Blender, but I’m going to try and be as thorough as possible for those that aren’t. The best way to learn things is to have a specific task you want to accomplish, or problem you want to solve. I hope this guide will be a good way for newbies to get to know this extremely powerful program.
First you will want to delete all the objects in Blender’s default scene. To do this, press A until everything is selected, then press X to delete them.
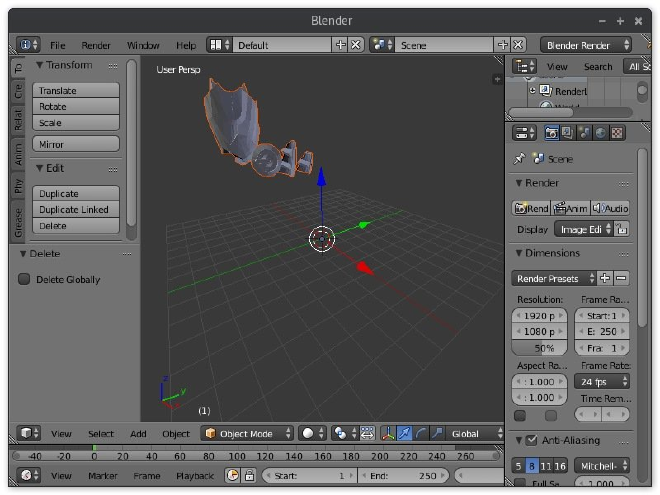
To import the OBJ file, go to File > Import > Wavefront (.obj). Select the file you exported in step 1.

Step 3 - Navigating in Blender #
Here are the basics of getting around in Blender.
Drag MMB(Middle Mouse Button): Rotate viewShift + MMB: Pan viewScroll wheel: Zoom in/outRMB(RIght Mouse Button): Select an object
Step 4 - Center the objects #
When your model is imported, it will likely be off in the distance. Lets move it back to the center of the scene.
- Select the group by right clicking on it.
- Move it to the center by dragging the arrows on each axis.
- You can also move things by pressing
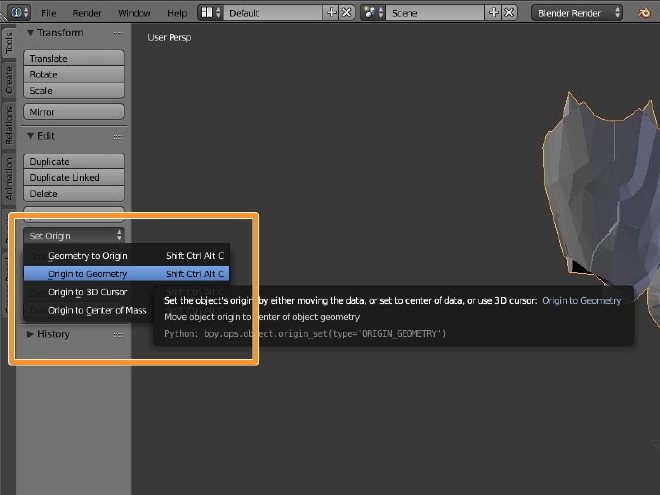
G. - To make things easier, you may want to reset the object’s origins. To do this, go to
Set Origin > Origin to Geometry. - At this point you will probably also want to save the model with
CTRL-S.
Step 5 - Check scale #
Models in Pepakura may have a scaling factor that is not applied to them when exporting. Lets check the scale in Pepakura and adjust our Blender model accordingly.
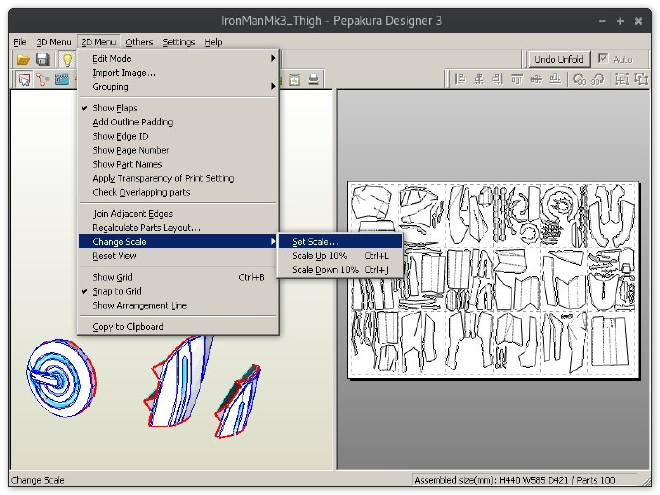
- In Pepakura Designer, go to
2D Menu > Change Scale > Set Scale. - Copy the scale value.
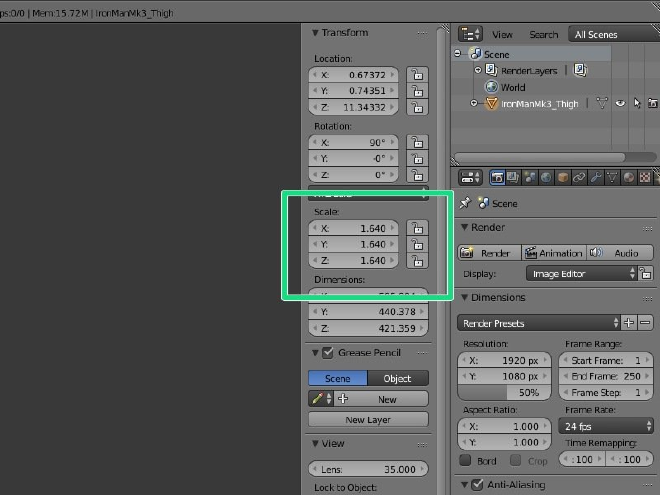
- In Blender, right click on your model to select it and then press
Nto bring up the Object Transformation panel. - Change the scale of all three axes to what you copied from Pepakura.

Step 6 #
You will also probably want to adjust the scaling factor so that the costume fits you better. To help you choose the correct size, you can take measurements from the model in Blender.
- Select the object and then switch to Edit Mode.
- Press
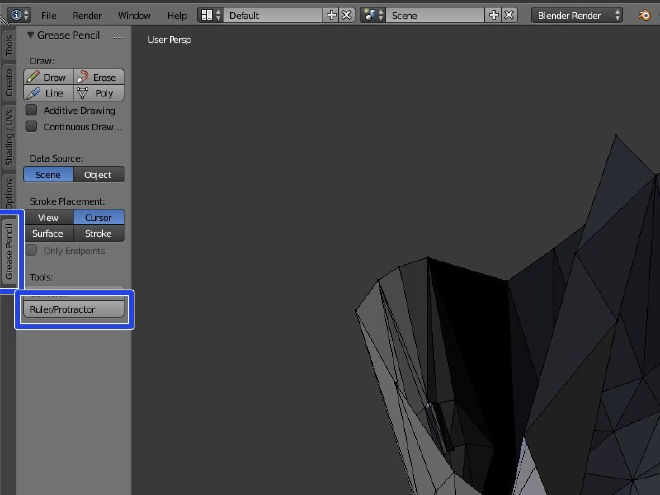
Auntil everything is deselected. - Go to
Grease Pencil > Ruler/Protractor - Hold
CTRLand drag the mouse from one point to another. - Press
ESCto clear the measurements.

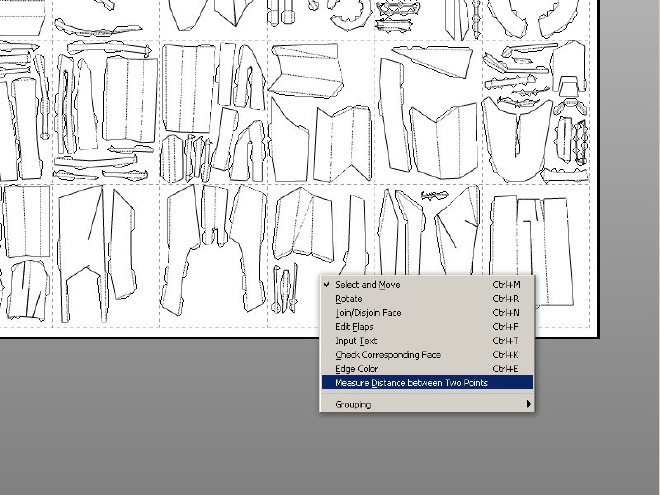
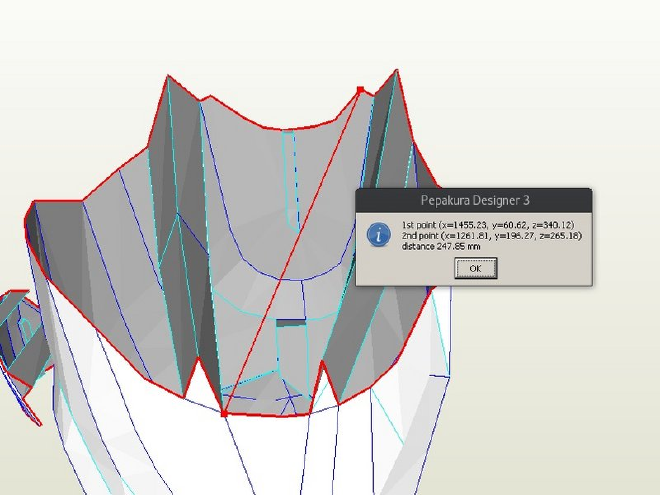
Step 7 #
You can also take the same measurements in Pepakura.
- Right click anywhere in the 2D view and select
Measure Distance between Two Points. - Now you can click on any two points in the 3D view to get a measurement.
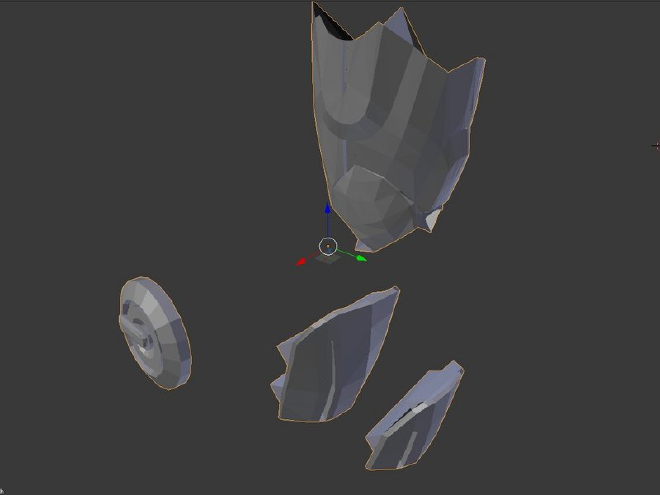
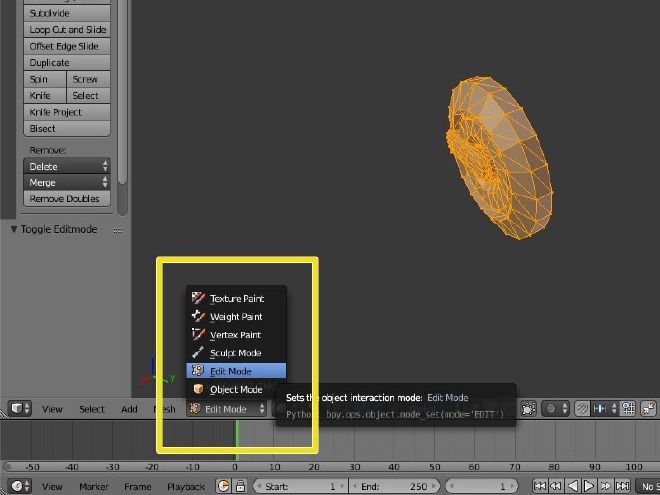
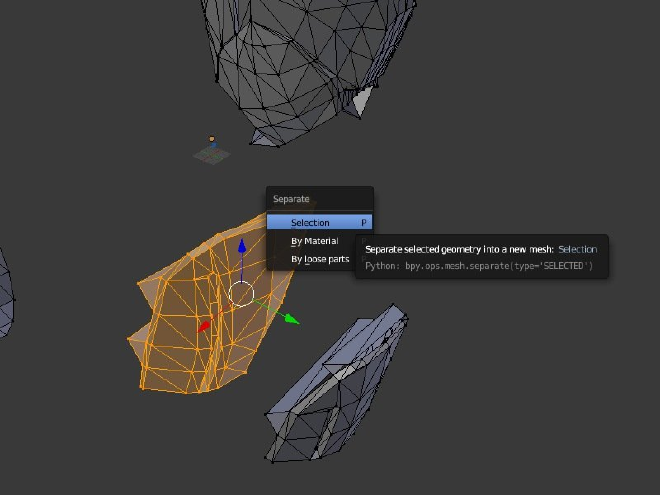
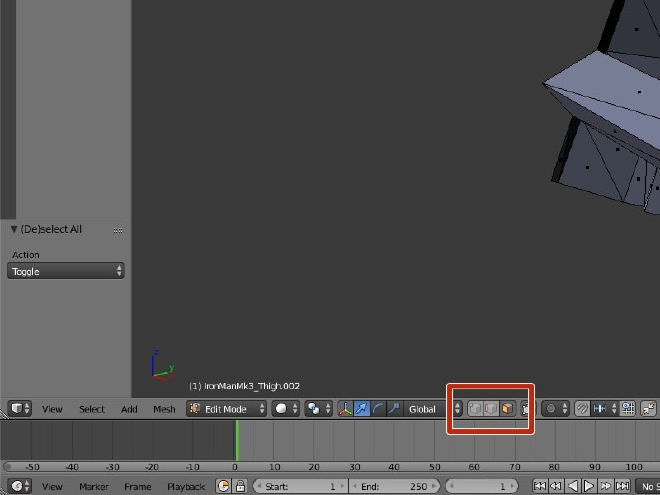
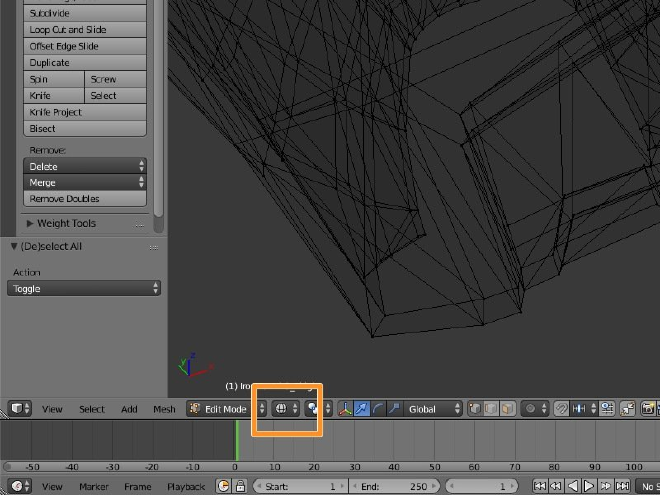
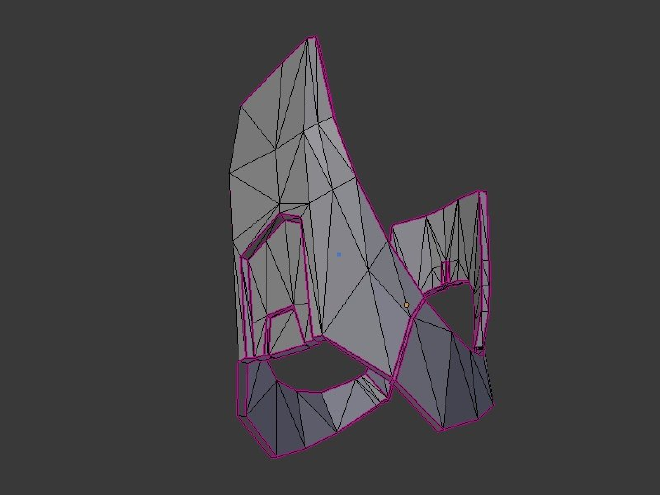
Step 8 - Seperate Objects #
Many Pepakura designs have multiple pieces on the same sheet. When you import them into Blender, they all come together as one group. We need to separate them in order to work on them individually.
- Select the group and switch to Edit Mode, if you are not there already.
- Press
Auntil nothing is selected, then right click on one piece to select one of its vertexes. - Press
CTRL-Lto select the entire piece (all linked vertices). - Press
Pthen chooseSelectionto separate that piece from the group.
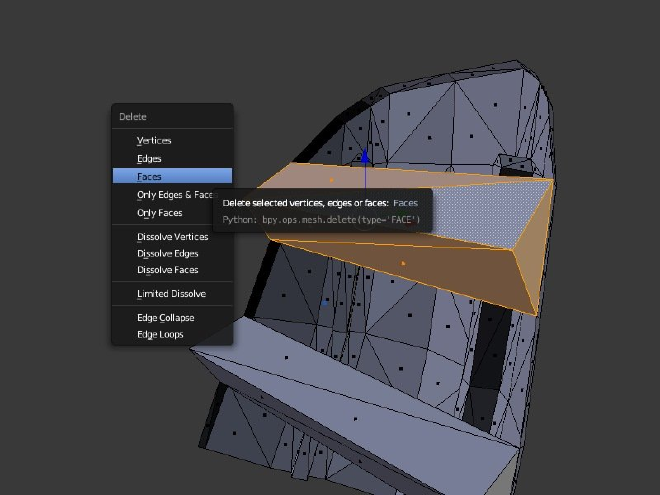
Step 9 - Remove Support Structures #
Now lets start working on cleaning up these pieces. Many Pepakura models have built in support structures, which are useful when building molds but not so much when 3D printing. We are going to remove these.
- Select a piece and go into Edit Mode.
- Switch to Face Select mode.
- You can select faces of the support structures by right clicking on them individually, but I find it easier to use Circle Select.
- Press
Cthen click to select faces touching the circle. - You can use the scroll wheel to increase/decrease the size of the circle.
- When you are done selecting, press
ESC.
- Press
- To delete the faces, press
Xand then selectFaces.


Step 10 #
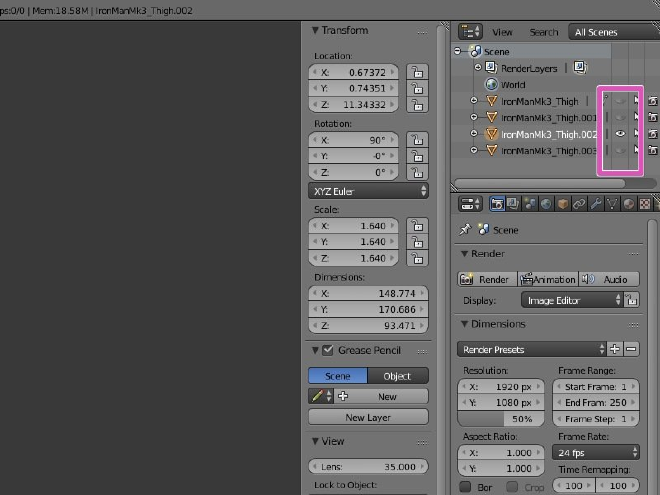
Tip: You can hide the pieces you aren’t working on right now by clicking the eyeball icon next to them in the Outliner.
Also remember to save your progress as you go (CTRL-S).
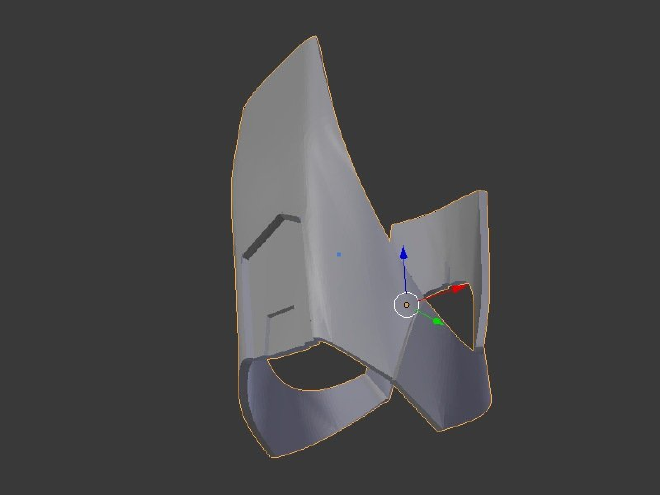
Step 11 - Enthicken #
The main problem with Pepakura models is that, since they are made to be printed on paper, they are only a surface. They have no thickness or volume. This means that there is not actually anything to print (i.e. the printer has nothing to fill in).
There are a couple ways we can give the model some thickness. I’ll go over doing it automatically, and a couple of manual methods for different situations.
The easiest way to do this is with the Solidify modifier.
- Select your object, then go to the Modifiers tab of the Properties editor.
- Click
Add Modifierand then chooseSolidifyfrom theGeneratesection. - Increase the thickness to whatever you think is best. I think 3.0 is a good starting point.
- If you want to make the changes permanent, you can hit
Apply. This is not really necessary, though. You can leave it as is, which will allow you to edit the modifier later.

Step 12 #
Here is an example where we don’t even need to use the Solidify modifier. This piece has a front and sides. All we need to do is give it a back.
- Switch to edge select mode and select one of the outer edges.
- Go to
Select > Edge Loopsto select the rest of the ring. - Press
ALT+Fto fill in the back with polygons.
Step 13 #
This piece is tubular. We need to give it an inside.
- Go into edit mode and press
Ato select everything. - Press
Eto extrude. This will make a copy of the mesh that is linked to the original around the edges. You can move this copy around with the mouse, but in this case we want to keep it in the same place so just pressESC. - Now press
Sto scale down the copy. We are going to turn it into the inside surface. - We want the inside of this tube to be just as tall as the outside, so press
SHIFT+Zto tell blender not to scale the Z axis. Conversely, you could pressZif you wanted to scale only the Z axis but not any others. The same goes for the X and Y axes as well. - Move the mouse until the tube is the right thickness, then press
ESCwhen you are done.
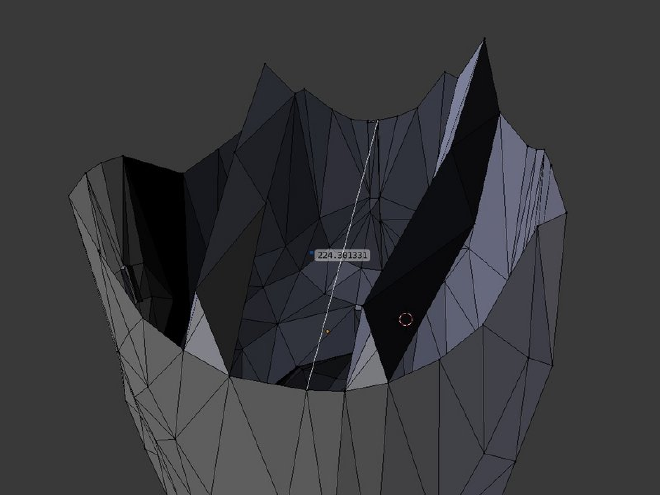
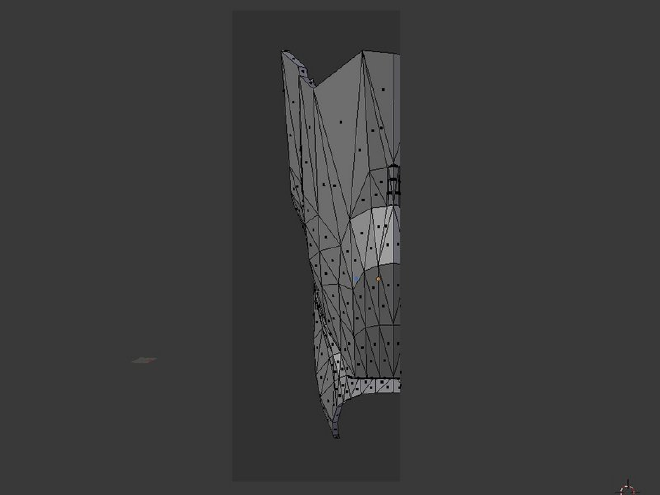
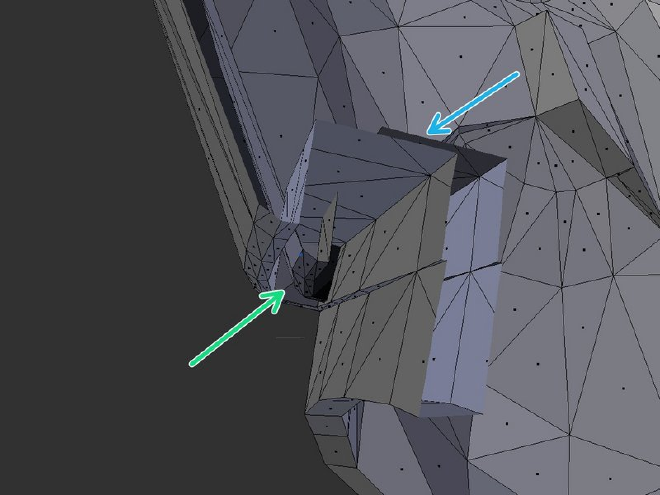
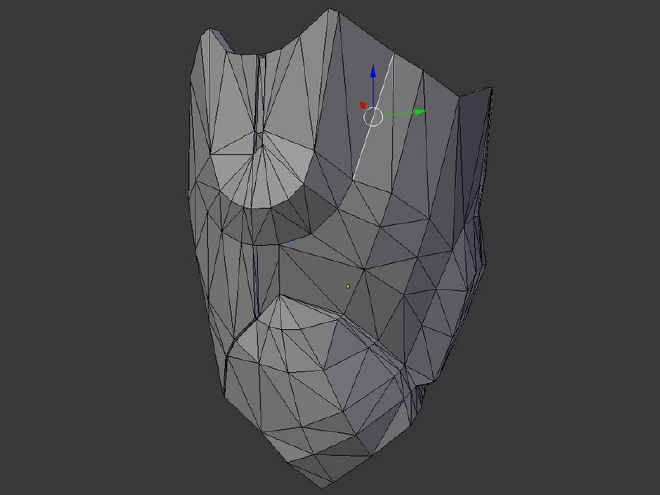
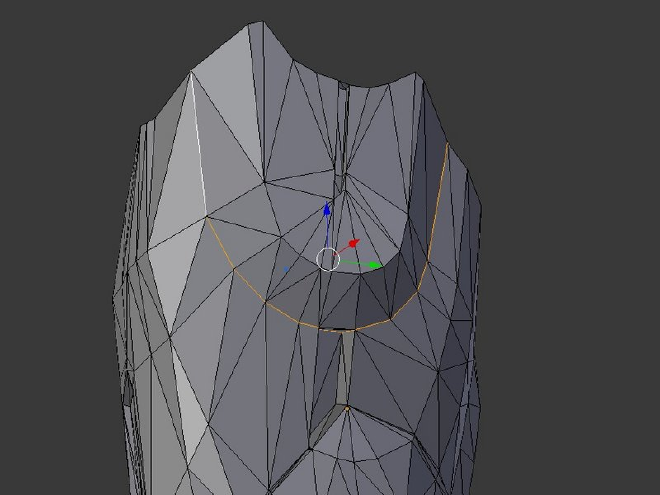
Step 14 - Check for thin sections #
Once you have given the mesh some depth, it is important to check and make sure there is no intersecting geometry, or thin sections that may be flimsy or not print at all.
- You can use
ALT+Bto slice open the mesh and see inside of it. - Here you can see a part of the inside that’s sticking through the outside. I’ll need to fix this by deleting faces and moving things around.
- This part is also very thin and might not print well.
- You can also switch the view to wireframe mode, to make everything transparent.
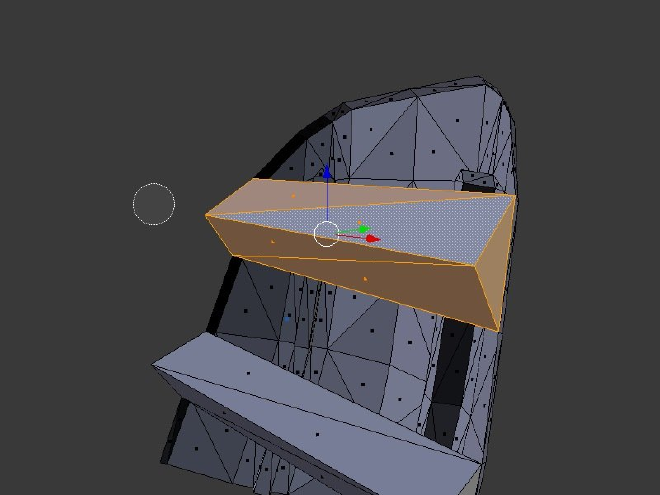
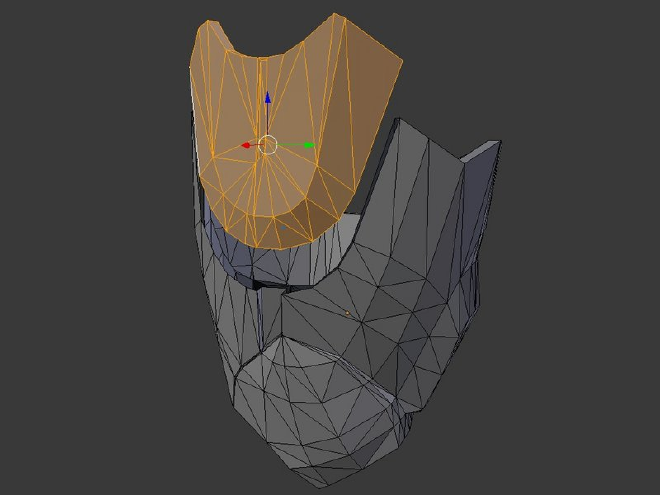
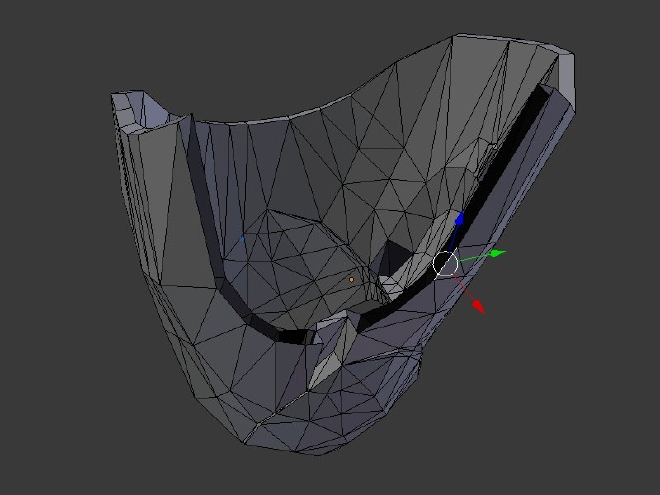
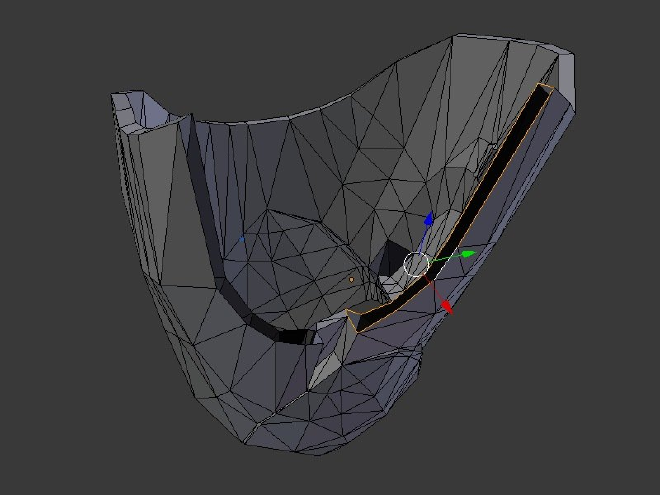
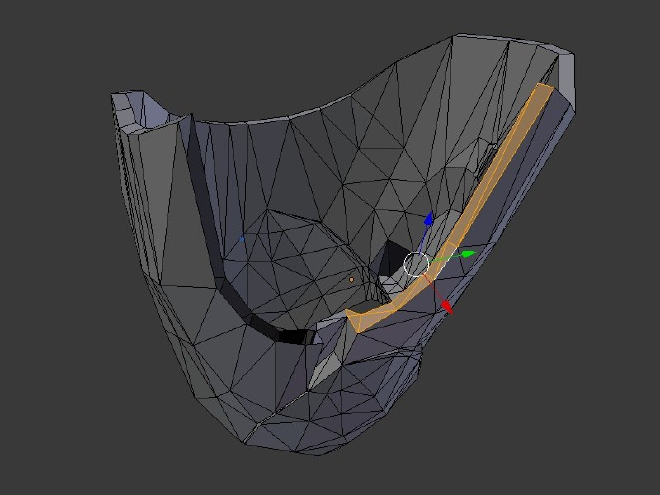
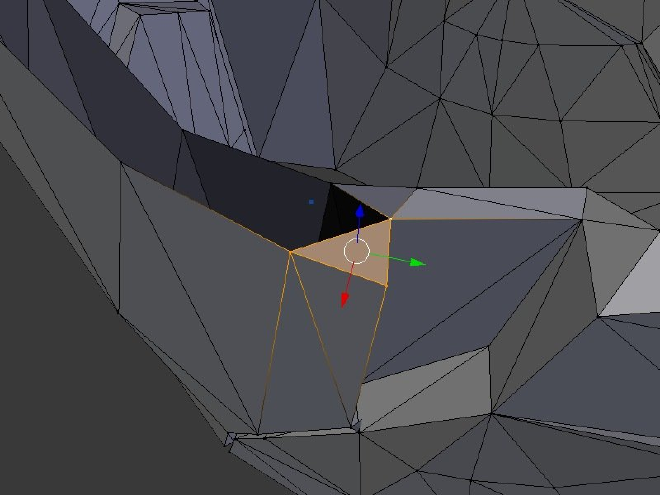
Step 15 - Splitting pieces #
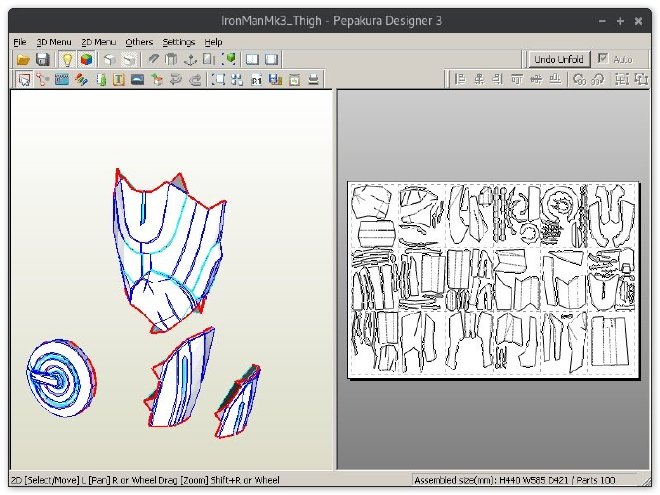
You may want to split parts into multiple pieces. For instance, if you want to print sections in different colors or if the whole piece is too large for your printer. In this case I am going to split Iron Man’s thigh into the gold section and the red section.
- We need to select the line where the cut will be made. Select one edge and then keep selecting more using
SHIFTorCTRL. CTRLmakes it easy by selecting the shortest path between the first line and the one you click on.- Press
VandESCto rip the mesh along the line you selected. - Press
CTRL+Lto select the entire linked section, then move it away from the rest. - Press
Pto ungroup it from the original.
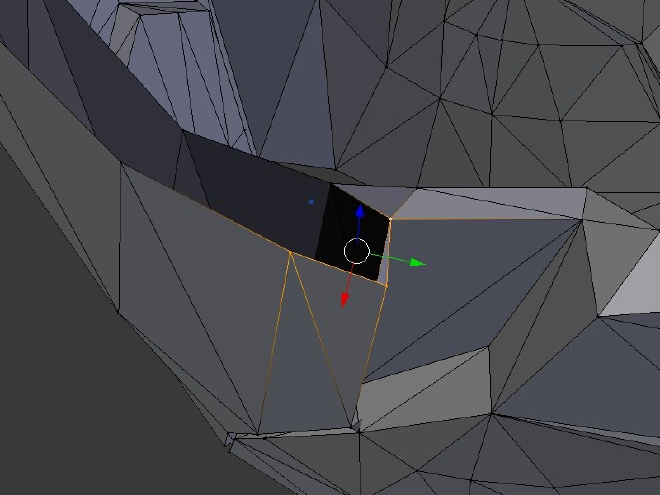
Step 16 #
We now need to fill in the space where the cut was made.
- Select one of the edges of the open area, then go to
Select > Edge Loops. - Press
ALT+Fto fill in the area.
Step 17 #
Sometime the auto-fill will not work well, in which case you will need to add faces manually.
Select 3 points, then press F to make a face from them.
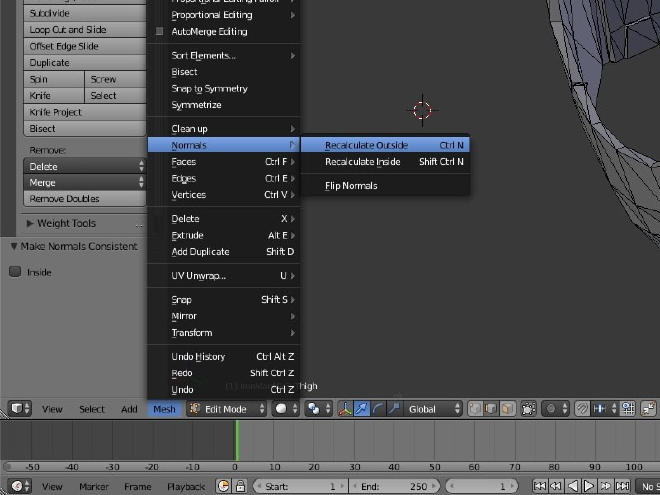
Step 18 - Clean up mesh #
Before we continue, lets make sure there are no problems with the mesh.
Normals are what determines which side of a face is the inside, and which side is the outside. If these are reversed, it can cause slicing errors.
- Select all then go to
Mesh > Normals > Recalculate Outside. If you see any faces change color slightly, it means they were reversed before.
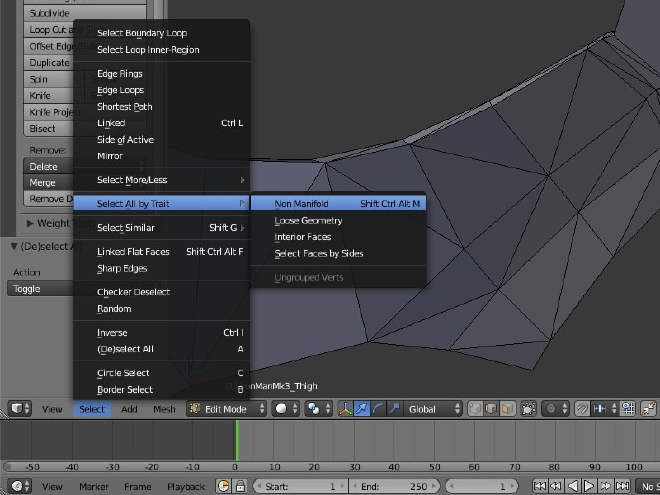
Now lets check for non manifold geometry. These are parts of the mesh that either have holes or are intersecting with itself.
- Go to
Select > Select All by Trait > Non Manifold. - Any parts of the mesh that are now selected have issues. You will need to manually fix these. The best way is to probably delete those faces and reconstruct that area.
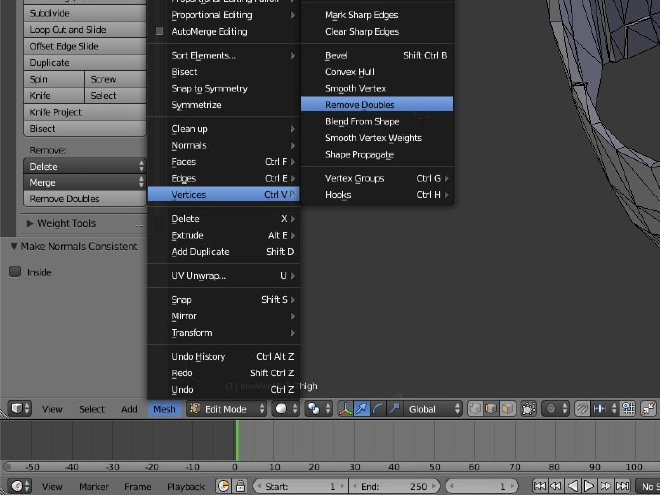
- One thing that often leads to non manifold geometry is vertices which are very close to each other but not actually linked. To fix these, select all and then go to
Mesh > Vertices > Remove Doubles.
Step 19 - Smooth surfaces #
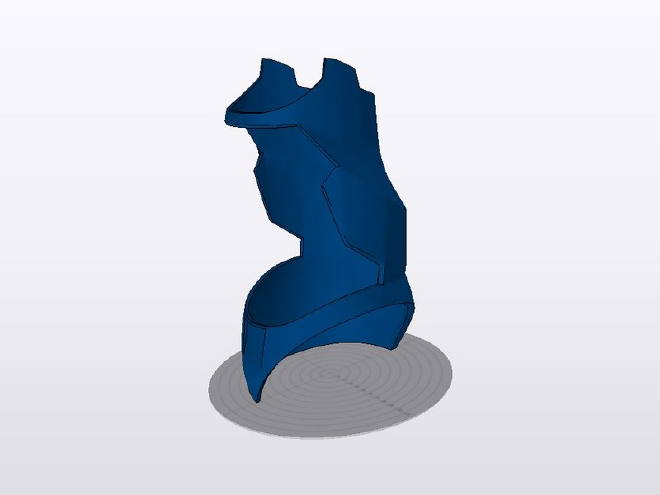
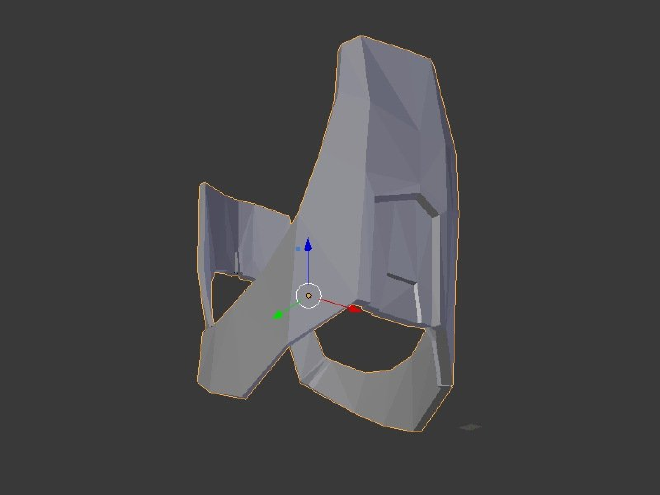
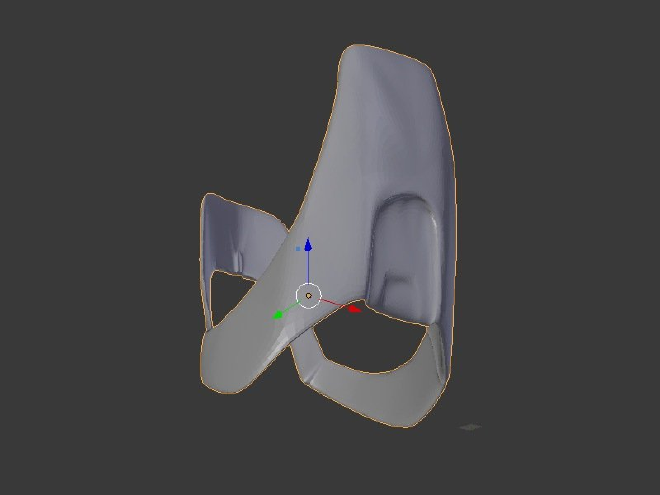
Congratualtions, we now have a printable mesh. However, it doesn’t look that good. Unless you are cosplaying as a low polygon video game character, you are going to want to smooth things out.
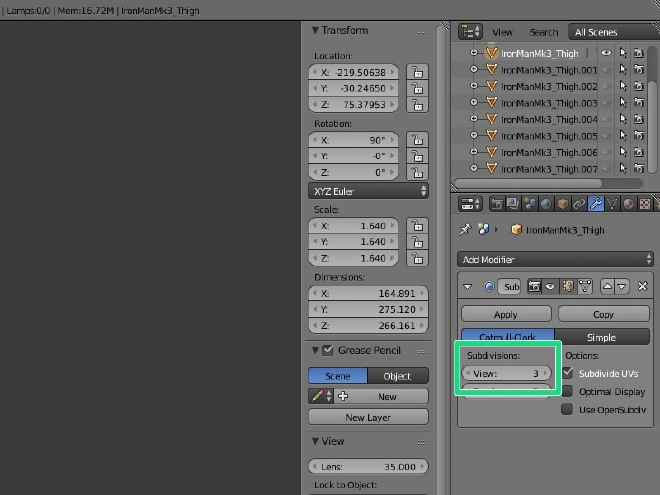
To smooth things out we are going to use Blender’s Subdivision Surface Modifier. Open to the Modifiers tab and then go to Add Modifier > Subdivision Surface.
The setting you want to play with now is the number of subdivisions (View, not Render). I generally like to do 3 or 4. The more subdivisions, the smoother the surface. However it will also make more polygons which means larger file sizes and slower performance.
Step 20 #
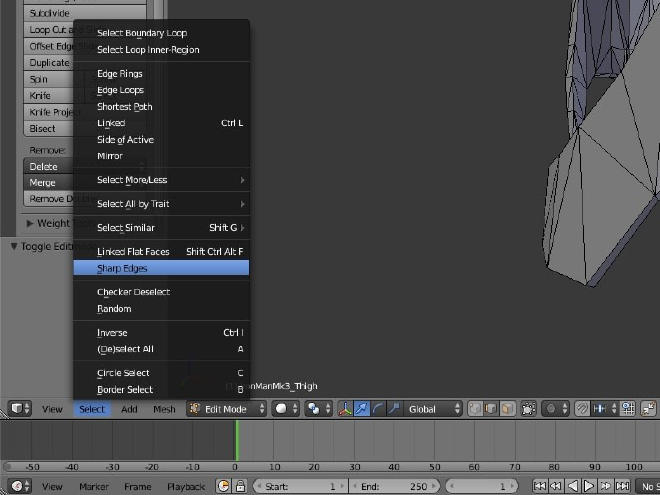
Blender’s smoothing algorithm will, by default, round off all edges. Even edges you may want to keep sharp. To prevent this, we need to tell it which edges we want to preserve by creasing them.
- Lets start off by temporarily disabling the Subdivision Surface modifier. You can do this by clicking the eyeball icon.
- Now lets select the edges we want to crease. An easy way to do this is by going to
Select > Sharp Edges. This will select all edges with a sharp angle. - Play with the sharpness threshold until it looks like it has most of the important edges. It does not have to be perfect. We can add or remove more later. This is just to give you a good starting point.
- Crease the edges by pressing
SHIFT+Ethen type1.0and pressENTER. - To uncrease an edge, you would type
-1.0instead - You can now unhide the modifier to see how it looks, then go back and crease/uncrease more edges as needed.
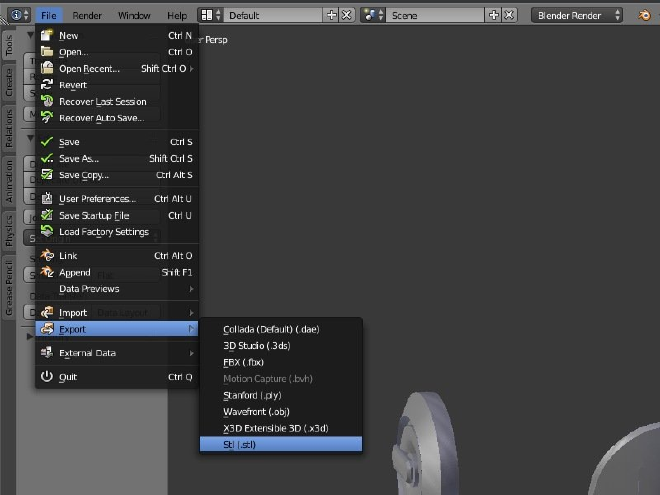
Step 21 - Print! #
Thats it! You now have a model thats ready for printing. Go to File > Export > Stl (.stl) to export the currently selected object. Now bring it into your favorite slicer and start printing.